AppColl Prosecution Manager is a cloud-based intellectual property management system that includes distinct and integrated modules. These modules are: Tasks, Matters, Prior Art, Files, Billing, Reports, Conflicts, Contacts, and Tandem. This document provides an overview of AppColl and each of these modules, what they do, and why you would use them.
Common Features of All Modules
Each of the seven modules can be accessed by clicking on one of the seven buttons [1] at the top of the page. All modules have the same basic layout built around a table of records [2], a Make Changes section [3], a Navigate Section (if the module has multiple pages) [4], and a Change View section [5]. All modules have a set of icon links to export/download data [7] and links into your settings [8].

Table of Records
The table [2] shows records within the AppColl database for the current module. Each record occupies a row in the table and clicking on any row opens a details screen for that record.
Clicking on a column header sorts the table by that column. Clicking again reverses the sort. The records may be filtered (i.e. show only records that meet filter criteria) using the "Add Filters" button in the Change View section [5]. Each module has a different set of available columns that can be added, removed, or repositioned by clicking the Columns link in the upper right corner [7].
For every user that logs in, AppColl saves changes to sorting, filtering, and columns separately for each module. These changes remain in effect until they are changed again.
Exporting & Downloading Information
The information in a table can easily be downloaded from AppColl as either a PDF file (for printing or emailing) or a Comma Separated Values (CSV) file (for manipulating or formatting in a spreadsheet program such as Excel).
To generate a PDF of the table, click on the PDF icon. To email a PDF to someone click on the Mail icon. Clicking the Excel icon opens a popup window where you can select whether to export "Visible information only" or "All information in the database" for the module. Visible information only includes the rows and columns currently visible in the table (including additional pages if the number of rows exceeds the value of Items/Page [6]). All information includes all rows and columns (whether visible or not). Selecting All Information, is the best way to archive data. The entire AppColl database can be downloaded to your local computer by exporting all information for each module.
Make Changes Section
From the Make Changes section [3], you can add a new record to the table, and edit or delete multiple rows simultaneously. To add a new record to any module in AppColl, you will always find the Add button in the upper-left corner of the margin. Other commands in the Make Changes section are module specific.
For example, the Tasks module Make Changes section allows for bulk edits for changing task owners, closing tasks, adding documents or comments, deleting tasks, and more. The Change View section in the Matters module allows for adding or deleting matters, creating matter specific form letters, changing matter contacts and more.
Navigate Section
The Navigate section [4] provides links to other pages associated with a module (if any). For the Tasks module, a link is provided to view/edit the Task Types and their rules.
Change View Section
The Change View section [5] is used to select which database records (i.e., rows) are shown for each module. The number of records shown/available is displayed next to the title at the top of the table (6). “(220 of 2735)” means there are 2735 task records in the Tasks module that have been filtered down to 220 based on the settings in the Change View section (in this case, showing only “All Open” tasks). Depending on the value of Items/Page in the Change View section, you may also see a drop down to select the page of records to show. The Wrap Text checkbox will cause AppColl to display as many columns as possible on the page, even if it means showing fewer rows, by wrapping text in the table cells.
You may narrow the list of rows based on one or more filtering criteria. Every database field associated with the module may be used as a filter (even if it is not shown as a column in the table). Click the Add Filters button to open the Filters popup window, shown below. Select a column to filter on followed by filtering criteria. Click the Add button, and AppColl will show the number of rows meeting the filter criteria. Additional filters can be added to further narrow the row count. Clicking the trashcan icon next to a filter deletes it. Clicking the Execute button runs the filters and returns all rows meeting the criteria. Filters applied to a module remain intact until they are changed or removed.

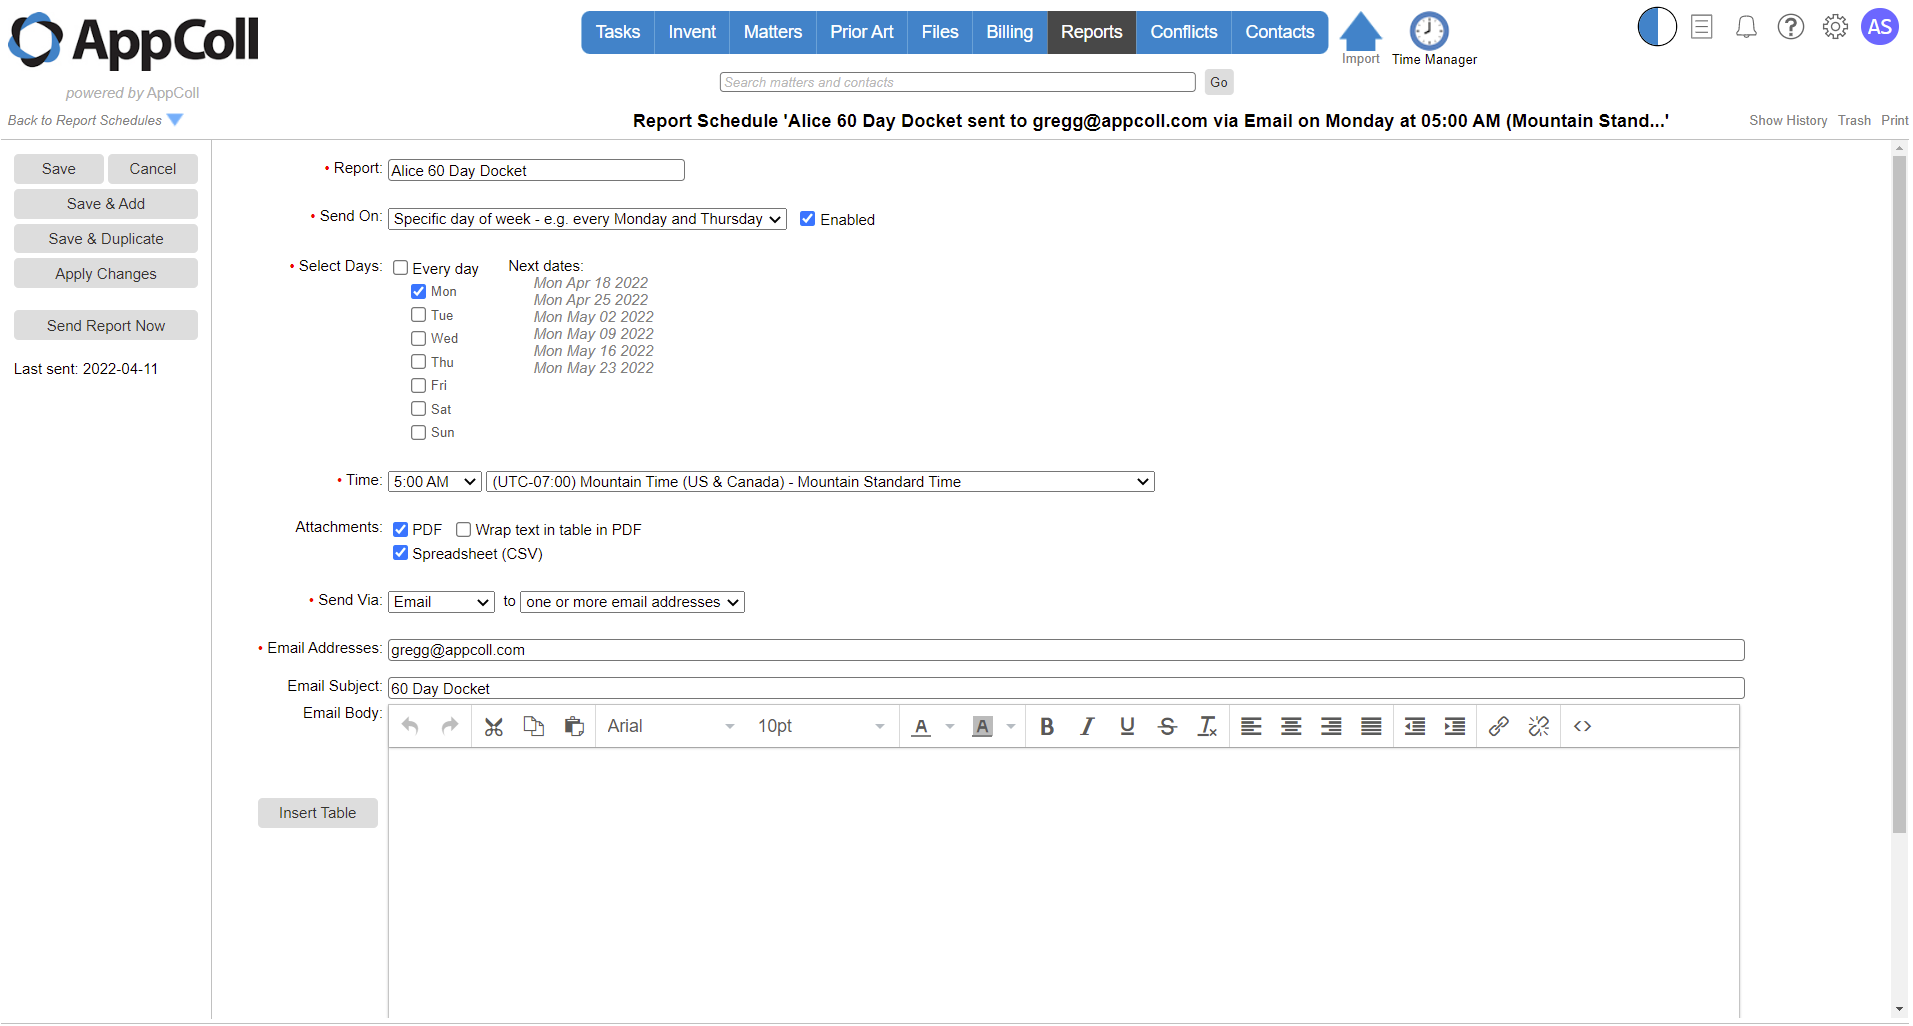
Back in the left margin, at the top of the Change View section is a Save View as Report button. This button saves the current set of filters, columns and sort order as a report, which can be run later without re-entering the criteria. After saving a report, it will appear in the drop-down beneath the Save View as Report button. Selecting the report from the drop-down menu will show the database records that match the filters at that time. You can create and run reports from any module, and schedule reports to be run and emailed at pre-defined intervals, in the Reports Module.
Help and Support
AppColl maintains an extensive knowledge base of articles and videos covering a wide array of topics. The knowledge is accessed from the Question Mark icon in the upper right corner of any screen.
Quick and easy access to support is provided on every page. Click the Question Mark icon in the upper right corner and click Contact Support to launch the popup window shown below. Typing a question in the Description box and clicking on the Send to AppColl button creates a case in our help system. Clicking the Previous Question tab provides a list of all questions submitted to AppColl and their current status. Clicking on one of the questions will open the full details of the response.

Tasks Module
The main purpose of the Tasks module is to show your active docket, using "tasks."
A task is either a) something someone needs to complete, such as "Respond to Non-Final Office Action," or b) a record of an event, such as "Received Non-Final Office Action."
The Tasks module is used to add, update, and close tasks in the system, and to add to or modify the available task types and trigger events that cause tasks to automatically generate.
All tasks have a status. If the status is “Open," work needs to be done on that task. If the status is something other than “Open,” the task is considered closed and no more work is required. Note that having a status other than “Open” does not mean the task was actually completed. For example, the status of the task, "Respond to Final Office Action - 2 Month Deadline," may be “Missed," which means the work was not completed by the deadline and an extension was required. If a task is a record of an event, it will be added to the docket with a status other than "Open," because it is something that already occurred.
Patent prosecution docketing items are tasks, as are internal workflow items, such as reporting to a client when an office action is received. Tasks are normally associated with matters in the system, although this is not required. Tasks are usually generated automatically in response to data changing in the system, either through manual changes (such as adding a filing date to a matter), when data is imported via an XML file or spreadsheet, or when another task changes status.
Commands in the Make Changes section of the left margin allow you to perform common operations on multiple tasks simultaneously. For example, using the "Close Tasks" button, you can easily complete multiple tasks at once, or using the "Set Owner" button, you can reassign task ownership to all tasks that match a particular filter.
Clicking on a task row opens the task details page where changes can be made, documents attached, and comments added. The bottom portion of the task details page shows general details and important dates about the matter associated with the task (if any).
Tasks can also have emails associated with them (called “Notifications”) that are sent automatically at certain points in time, normally when the task changes status. These emails can be populated with information from the database (similar to the mail merge feature in a word processor), simplifying the creation of standardized emails for certain activities.
Matters Module
A matter is something associated with a set of tasks and billed separately to one client. Examples would be patent or trademark applications, invention disclosures, litigation cases, licensing agreements, and copyright filings. All of these can be entered and tracked in AppColl.
The Matters module is used to manage all types of matters. Matters can be added and updated, and for convenience, tasks associated with a matter can be easily updated directly from the Matter Details page for a matter.
All matters are identified in AppColl by the Attorney Ref field, which must be unique in the system and may use any combination of up to 128 characters. It normally contains the reference number or name used by the firm managing the matter.
Matters normally have one key owner, the Attorney, although multiple people can be associated with a matter using other available fields such as Partner, Paralegal and Contributor. The attorney for a matter is typically the default owner of tasks generated for that matter. However, this can be changed on a per-task-type basis.
Matters have a status, which generally indicates the current point in the life span of the matter. Patent matters for example, would go through the following statuses: Unfiled, Pending, Published, Issued, Expired.
Matters can be connected, creating a family. Matter connections are normally generated automatically for patents and trademarks when importing data from the USPTO Patent Center and TSDR websites, although connections can be added manually. There are two main types of connections: priority connections, which affect the priority date of patent matters, and others, which are used for generating Information Disclosure Statements in the Prior Art module.
Clicking on a matter row opens the Matter Details page. Each Matter Details page is divided into three sections: commands (left margin), bibliographic information (top), and task history (bottom). Between the top and bottom sections, there is a vertically adjustable gray line to expand or decrease the height of the bottom section.
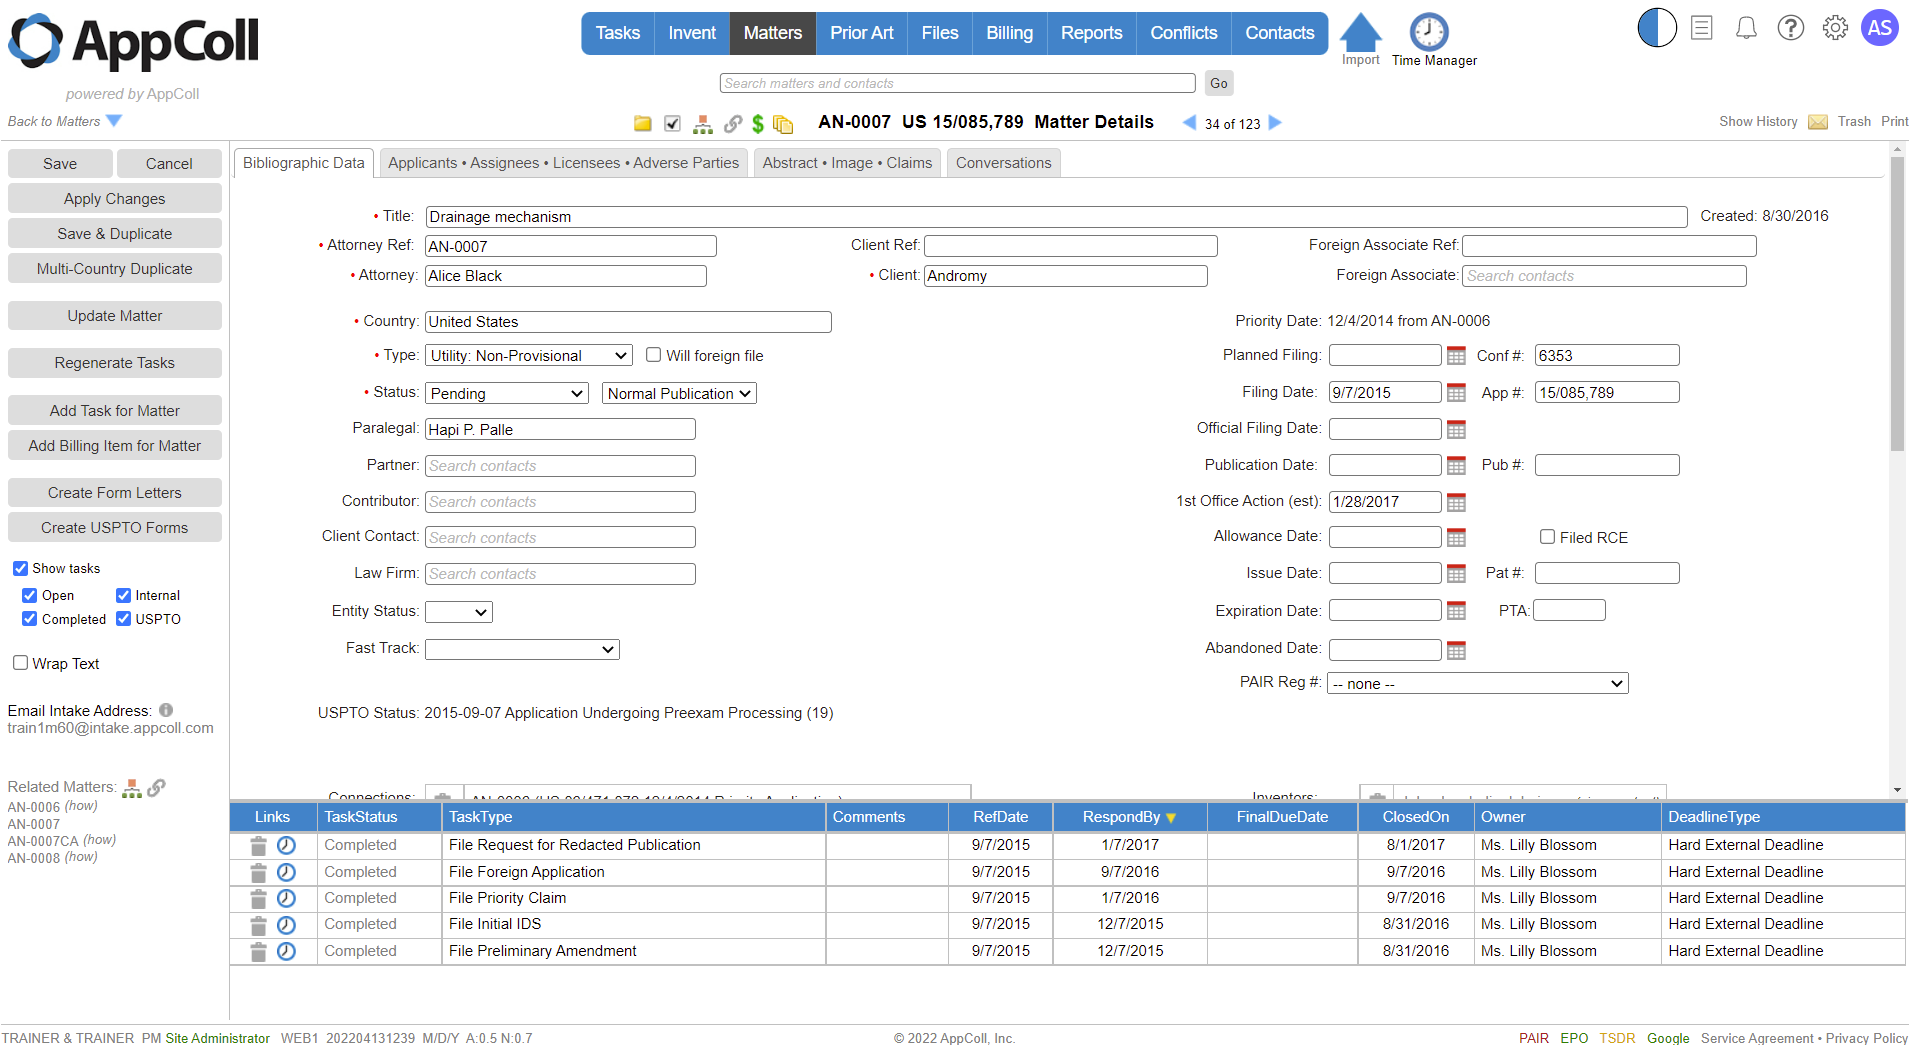
Bibliographic Data
Commands
The command buttons in the left margin allow you to save changes to a matter, create a duplicate matter, and update the bibliographic information. You can also add tasks and billing items for the matter, and create PTO forms and custom form letters, both populated using information from the matters database.
Related Matters
Beneath the commands is the list of related matters based on the connections specified. Note that a direct connection is not required for matters to be related. If matter A is connected to matter B, and B is connected to matter C, AppColl will automatically determine that A is related to C.
Bibliographic Information
The top portion of the Matter Details screen shows bibliographic information. For US patents and trademarks, this information is normally imported via XML data files downloaded from the USPTO Patent Center and TSDR websites. Patents are updated manually and trademarks are updated automatically every 7 days. Foreign patent and trademark matters must be imported from spreadsheets or manually entered since there are no public databases where AppColl can retrieve this information. The majority of the bibliographic information is common across both patents and trademarks. However, there are some differences between the two. For example, patent matters include inventors and art units, while trademark matters include goods and services, and an image of the logo or text.
Task History
The bottom section of the Matter Details page lists the task history of the matter, showing individual tasks with their status, comments, reference date, respond by date, final due date, closed on date, task owner and deadline type. This information is the same as available in the Tasks module, just limited to tasks associated with the matter. The status of a task in the task history can be changed quickly by simply clicking on the status text, then making your change within the resulting pop-up window. Clicking on a task name will open the task details page. If the matter has been updated via an XML import from the USPTO, several event tasks starting with “USPTO…” will be present showing the prosecution history as recorded by the USPTO.
Applicants, Assignees, Licensees, and Adverse Parties
The second page in Matter Details is used to record other parties associated with the application: Applicants, Assignees, Licensees, and Adverse Parties. You reach this page by clicking the tab at the top of the page. These fields are also available for use in form letters.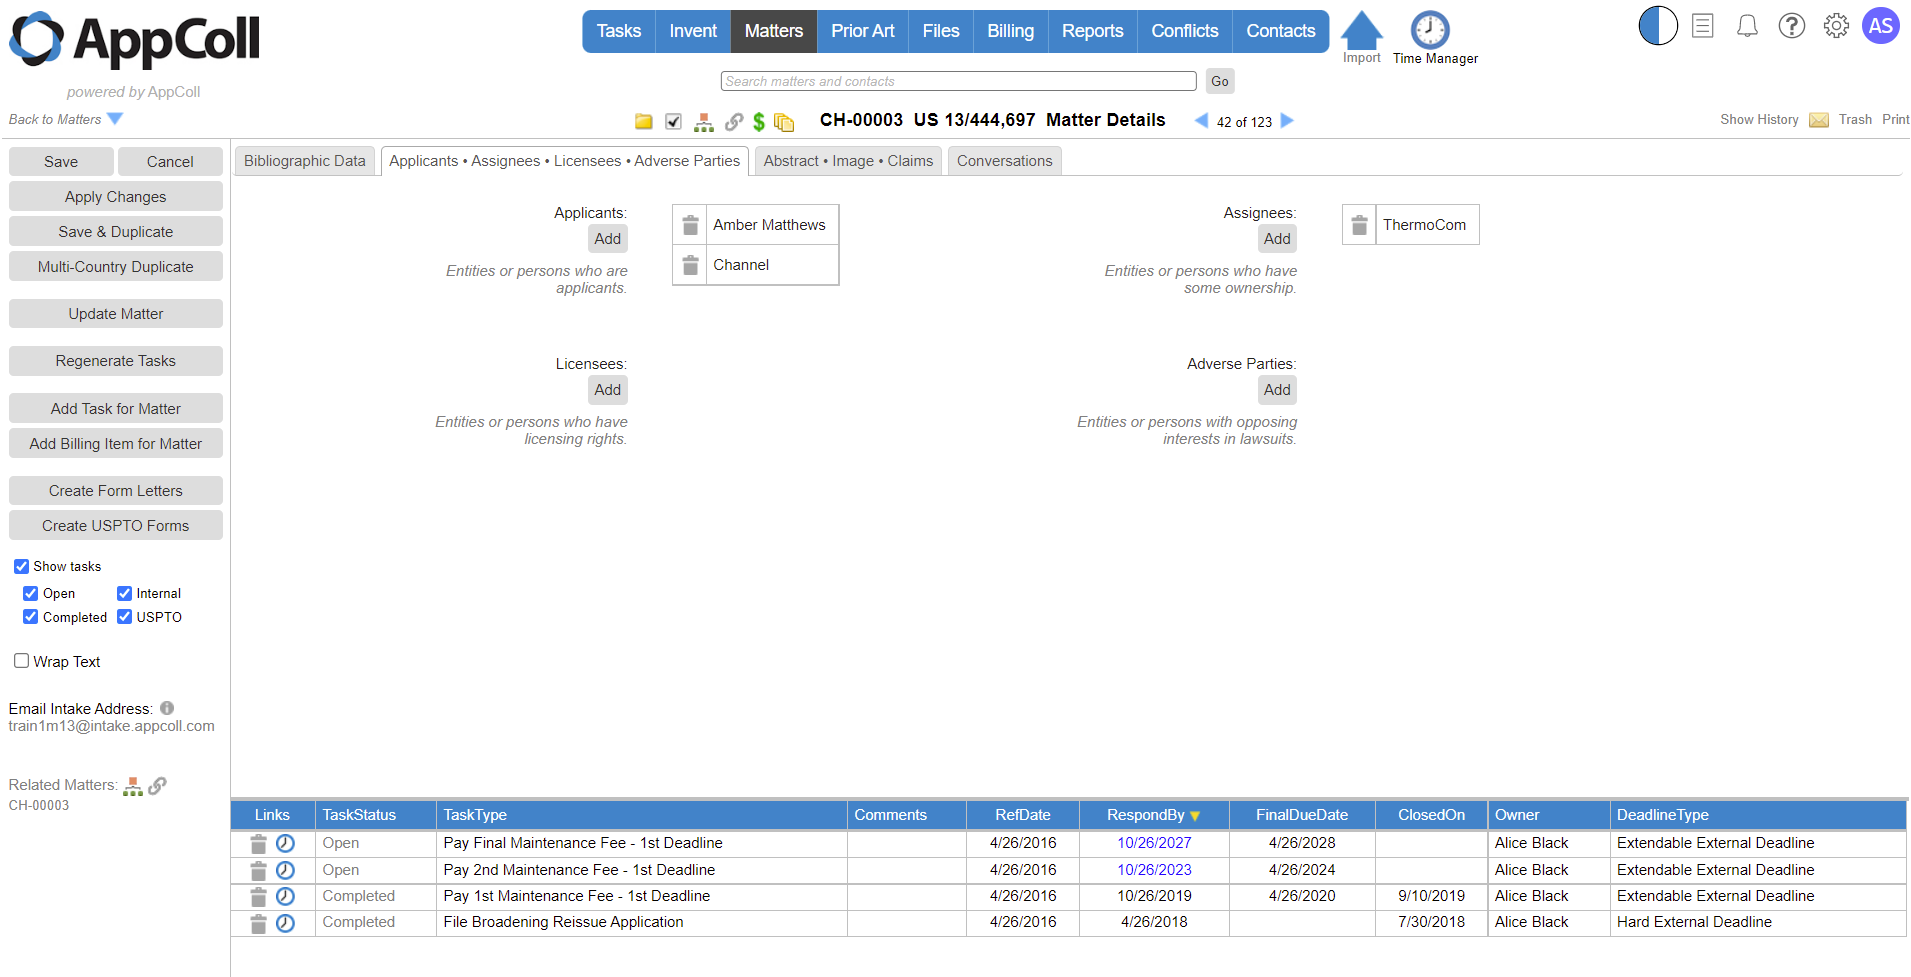
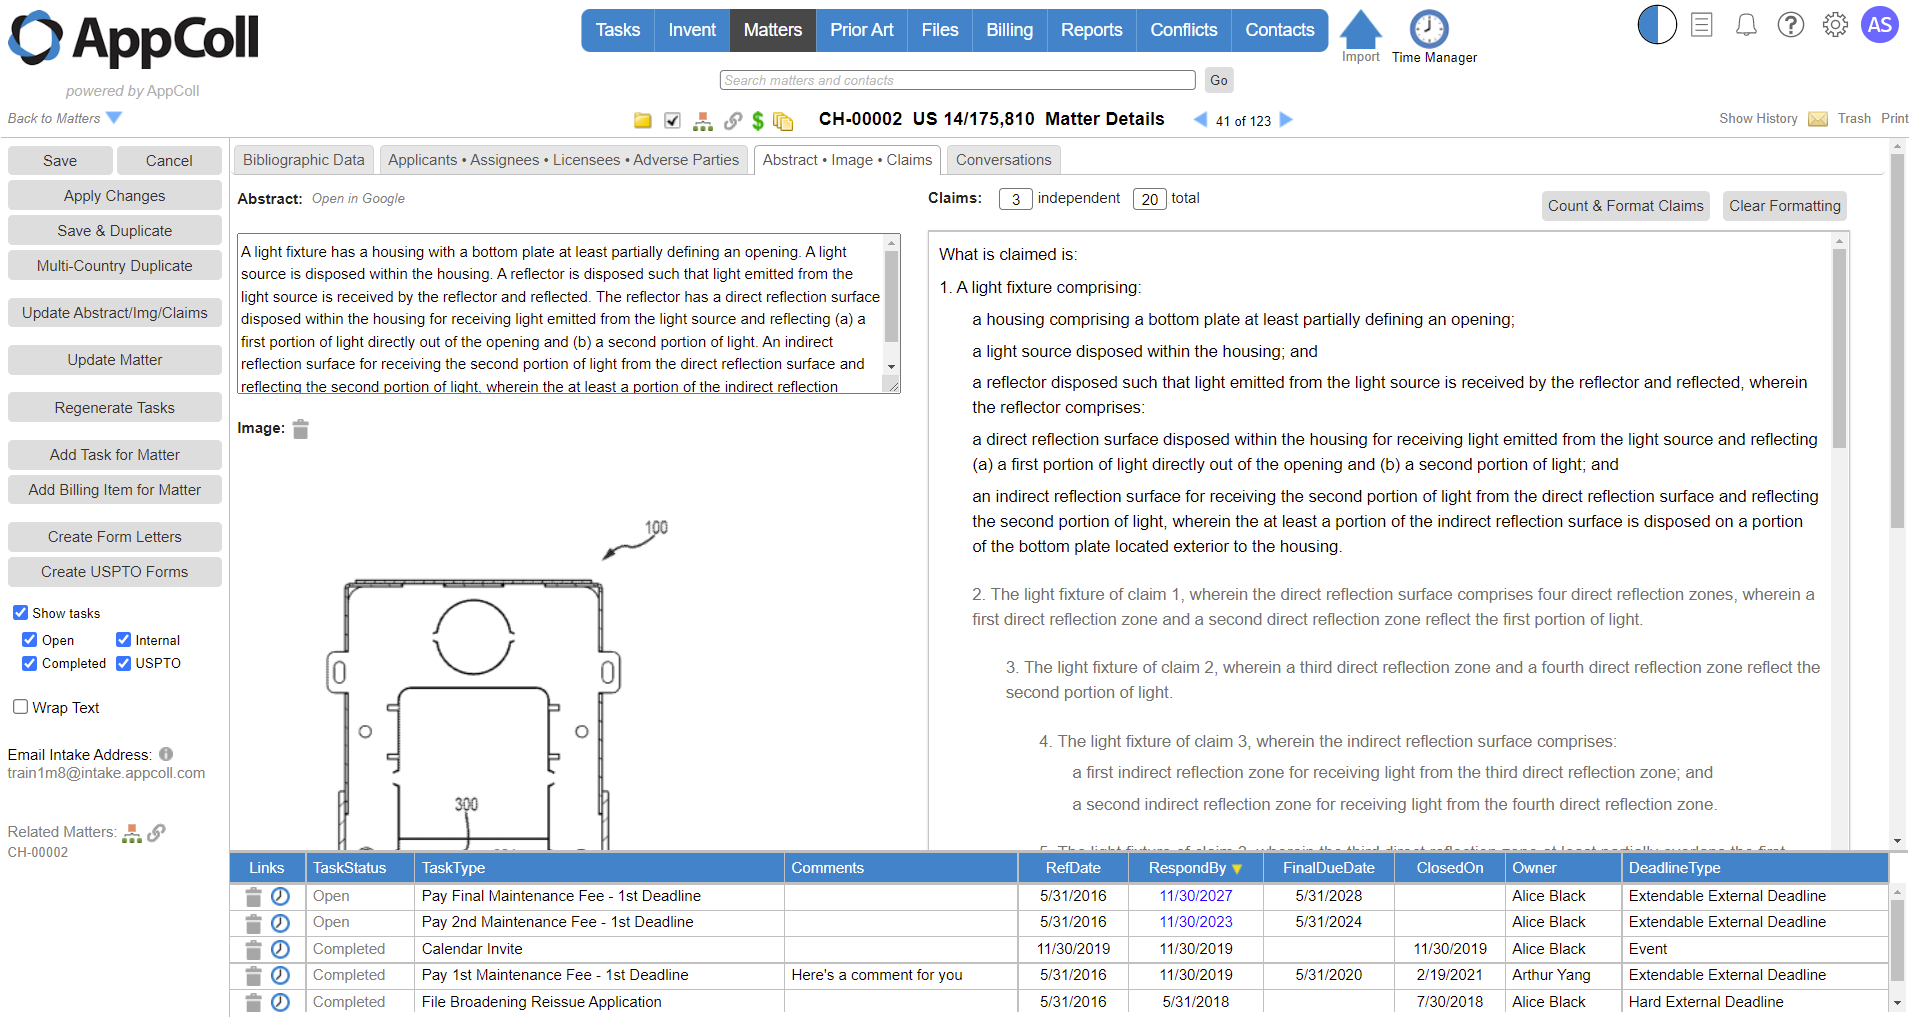
Abstract & Claims
Patent matters have an additional tab labeled “Abstract & Claims,” which displays the published or issued claims, abstract, and the primary figure.
Prior Art Module
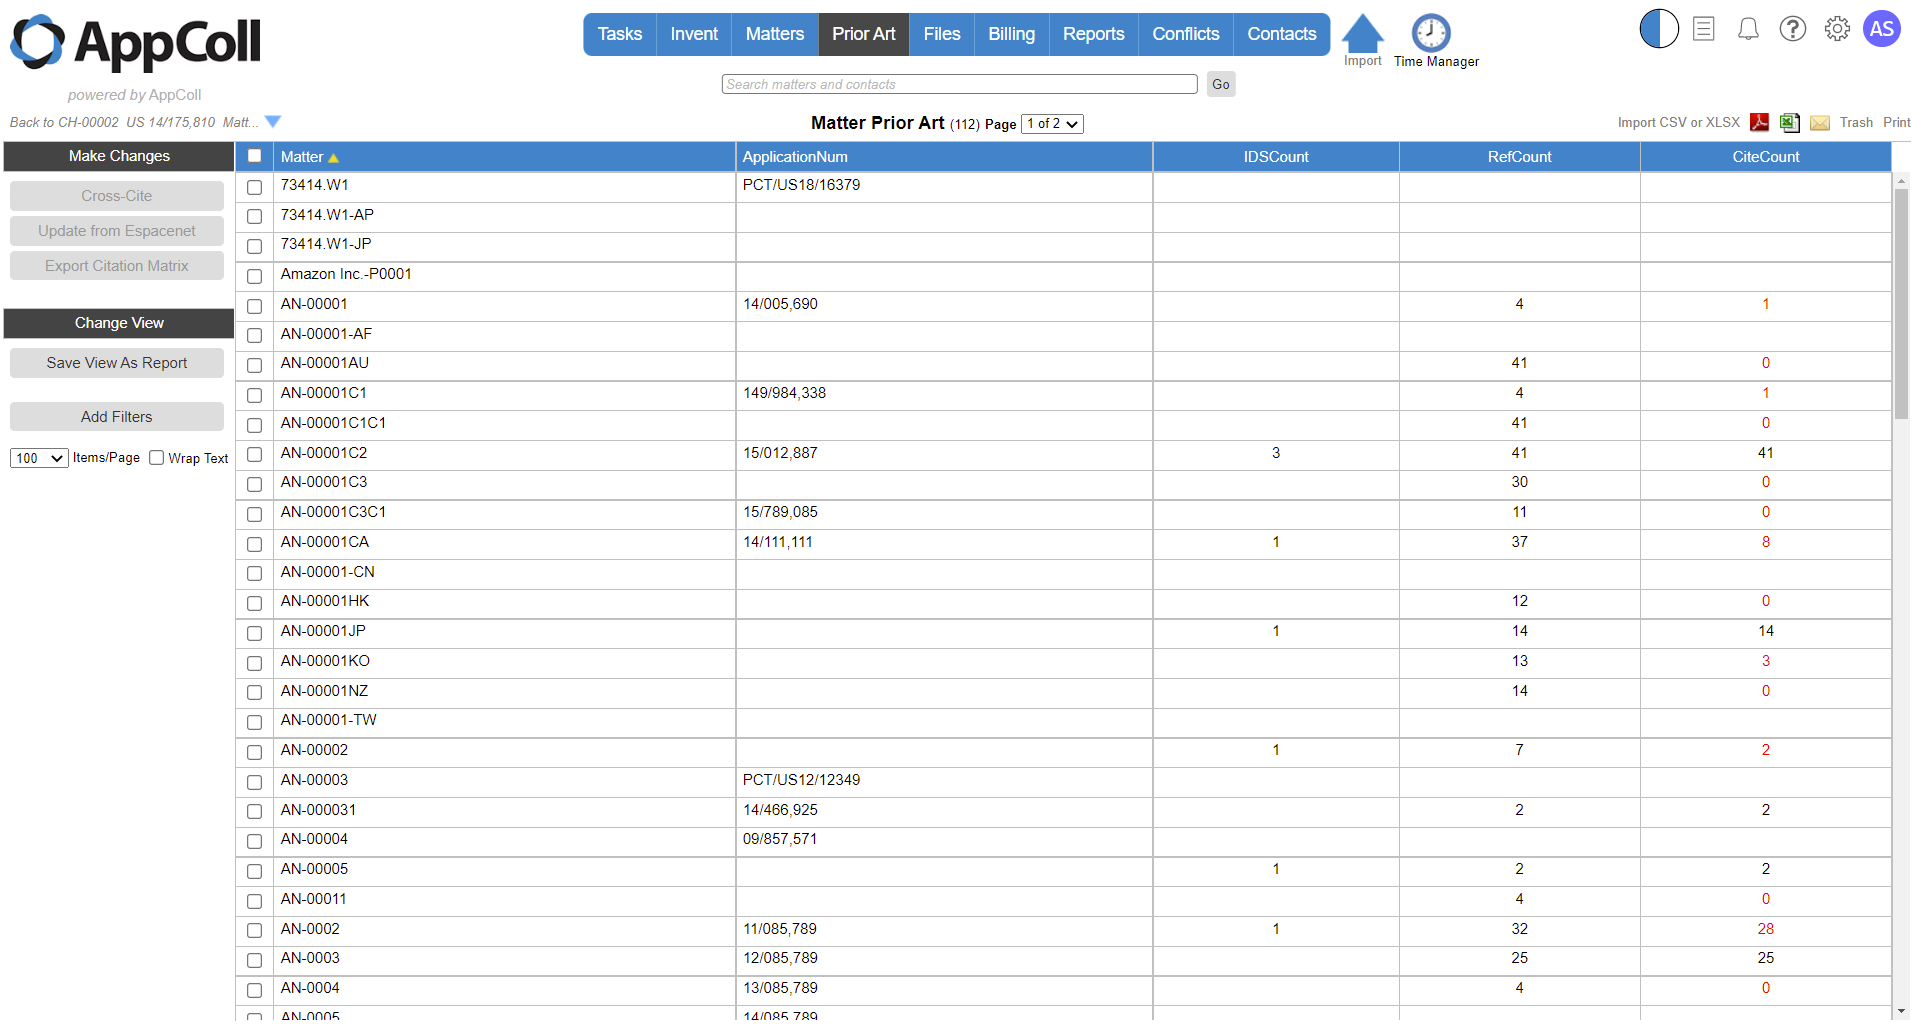
The Prior Art module is used to keep track of prior art references for all patent matters, both foreign and domestic, and to generate Information Disclosure Statements (IDS) for US patent matters. This module maintains a database of which references have been cited in IDSs for all members of a matter family, something that can be difficult to track manually using spreadsheets or other techniques for complex matter families, potentially involving thousands of references. The module also populates the USPTO SB08A IDS form using an XML data file, making the process of completing the form instantaneous and without the possibility of human error.
Prior art references, which can be patent publications or non-patent literature (NPL), are stored once in the system and then linked to every matter that cites them. Reference links to matters can be freely added and removed without affecting the reference itself. You can also upload the original and translated documents for a reference, such that the complete set of documents for a particular IDS can be easily downloaded with a single click.
References can be added manually, imported into the system from previously filed IDS forms, or from a spreadsheet. AppColl simplifies the process of adding references manually by looking up a publication number in public databases such as Espacenet or Google to fill in the kind-code date, reference title, publication/issue date, and inventor information. Also, when references are added to a matter, the reference can be automatically linked (cross-cited) to all un-issued related US patent matters, greatly simplifying the process of adding references to matter families.
The main prior art table lists each patent matter along with its Application Number and three columns titled IDSCount, RefCount, and CiteCount. The IDSCount is the number of IDSs created within AppColl for that matter. The RefCount is the number of prior art references that have been associated with the matter, and the CiteCount is the number of prior art references that have been cited in IDSs, which can include IDSs created both inside or outside of AppColl. If the RefCount and CiteCount are equal then all references associated with a matter have been cited in one or more IDSs. If the CiteCount is red then there are references associated with a matter that have not been cited yet.
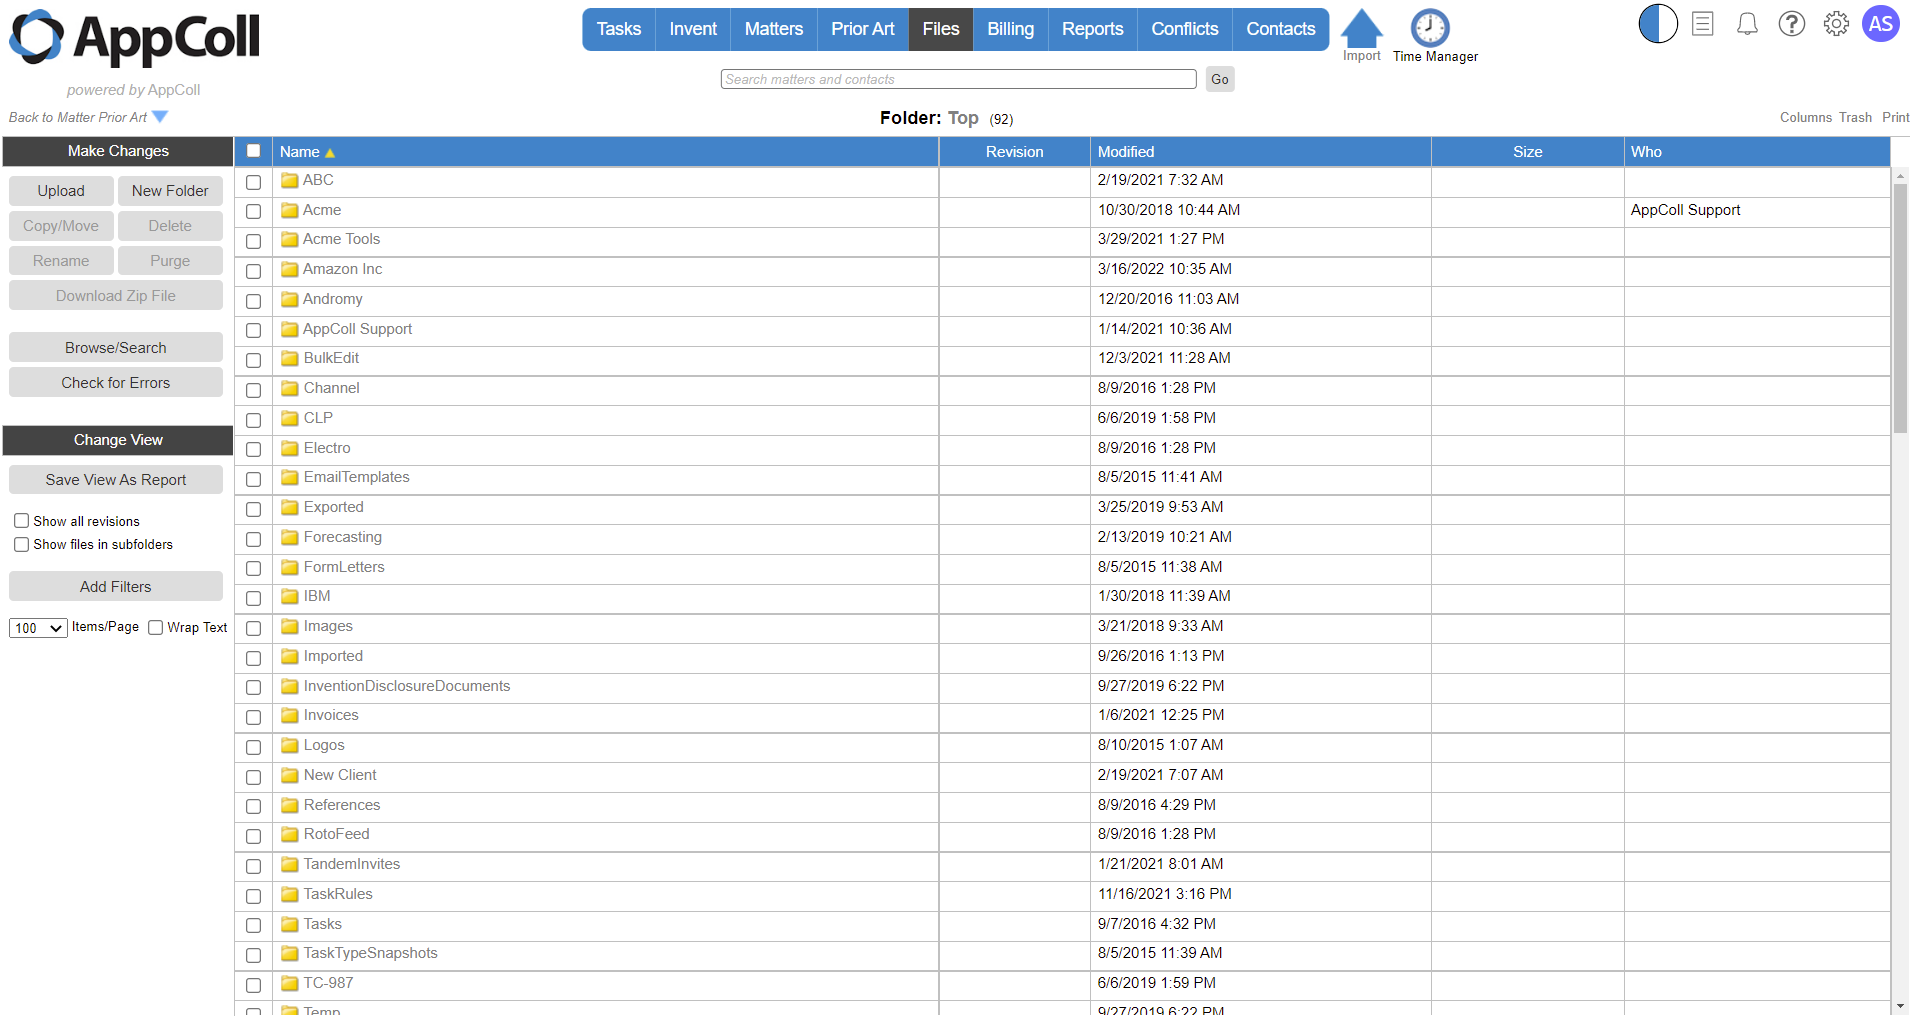
Files Module
The Files module is used to upload and retrieve documents associated with AppColl to or from the cloud, so they can be easily accessed anywhere from any device.
By default, AppColl will automatically create folders for each client and then subfolders for each matter to simplify management of documents, but the Files module supports custom organization of documents, as required. In addition, a standard set of sub-folders can be created within each matter folder, when that matter is created. All documents are stored encrypted on AppColl’s servers using 256 bit AES encryption, making them secure.
When uploaded, one or more documents may be associated with a task so that they can easily be accessed from the Tasks module when viewing that task.
Clicking on a document in the Files module opens or downloads the document. Clicking on a folder opens that folder. Documents and folders may be easily renamed, copied or moved around the folder hierarchy in AppColl.
There are no restrictions on the types of documents that may be uploaded to AppColl (with the exception of some executable file formats the represent a security risk). When downloading a file, you must have a reader or application of the appropriate type on your device to view the file.
Multiple documents or folders may be uploaded in a single zip file, which will be unzipped after uploading to automatically create a complex folder structure in AppColl. Similarly, a complete folder structure can be downloaded from AppColl as a zip file with a single click.
The Files module maintains revisions of every document uploaded or created in AppColl. Documents are never overwritten in AppColl. If a document is uploaded or copied to a destination with a document of the same name, AppColl simply creates a new revision of the document. All revisions of a document can be displayed by selecting the "Show all revisions" option.
AppColl also provides a "Show files in subfolder" option that allows a flat view of all folders and documents in the system. This features makes it very easy to search for any file stored in AppColl.
Billing Module
The Billing module keeps track of fees and expenses associated with clients and matters, and generates invoices that are organized in a way appropriate for intellectual property legal work. The module may also be used to track spending on individual matters by importing invoice and spending data generated outside the system. This is particularly useful for corporations using outside counsel to prosecute their patents and trademarks.
The module operates differently from some invoicing systems, such as QuickBooks. In AppColl, "billing items," such as fees and expenses, are created separately as they are incurred, using a simple input form. Subsequently when an invoice is created, existing billing items are included based on their date and other criteria. Only billing items with dates between a chosen start date and cut-off date are included in the invoice. Once associated with an invoice, billing items cannot be associated with another invoice. Billing items can be also removed or excluded from a particular invoice. This means, for example, that you can choose to defer invoicing of a particular billing item until a specific task completes, such as filing a patent. This provides great flexibility when invoicing clients.
All types of financial transactions with a client are recorded as billing items, including fees, flat fees, expenses, payments received, write-offs, adjustments and retainers. All billing items can be searched and filtered for, making it easy to generate reports containing just the information you need.
Invoices can be easily generated with fully customizable content. You can include as much detail as required, and configure sections (such as account activity and a matter fees/expenses summary) to be included. In the invoice, billing items can be grouped by matter, to make it easier to view the charges on a matter basis.
 Every time you save an invoice, AppColl automatically creates both a PDF of the invoice and an electronic invoice in the Legal Electronic Data Exchange Standard (LEDES) format. Consequently the LEDES format is readily available if a client requests it.
After an invoice has been sent to a client, AppColl restricts any changes from being made to that invoice or the billing items that are included. This prevents the situation where the invoice in AppColl is different from the invoice the client received because data was changed after the invoice was sent.
To simplify time entry, AppColl provides a billing Timer, which is found at the top of every module. Click the Timer clock, enter a client, matter, task (optional), and description, and click start. Multiple Timers can be created, although only one can be running at a time--starting a Timer pauses all others. At the end of the day, all Timers will be closed, with the total time of each Timer being stored as individual billing items.
Reports Module
The reports module is used to run reports previously created and saved in one of the other modules. Select a report from the top dropdown menu and AppColl automatically runs the report with current data. A saved report is essentially a saved database query. When you rerun the report, any information in AppColl’s database that matches the filters, at that time, will be displayed.
On the far right side are three icons used to download the report as a PDF or CSV file, or to an email as a PDF attachment.
One special kind of report available in the Reports module is an account activity report. AppColl maintains an account activity log of all information changed in the system, including who changed the information and when the change was made. The logs are listed in the Reports dropdown menu, beginning with “Account Activity." Activity logs can be filtered by matter, date, who did the action, and specific text within the description. These reports are very useful for understanding when a particular change was made in the system and who or what caused it.
Reports can also be scheduled to run at predefined intervals and emailed or FTP’d to a list of recipients by clicking the Manage Report Schedules link in the upper left corner. Scheduling a report is similar to scheduling a recurring meeting in a calendaring system.
Contacts Module
The Contacts module is used to store contact information for people, law firms, and corporations used in AppColl. For example, you would create a client contact in the Contacts module to use that client when creating a matter in the Matters module. Everyone who has a login to AppColl has a corresponding contact record in the Contacts module.
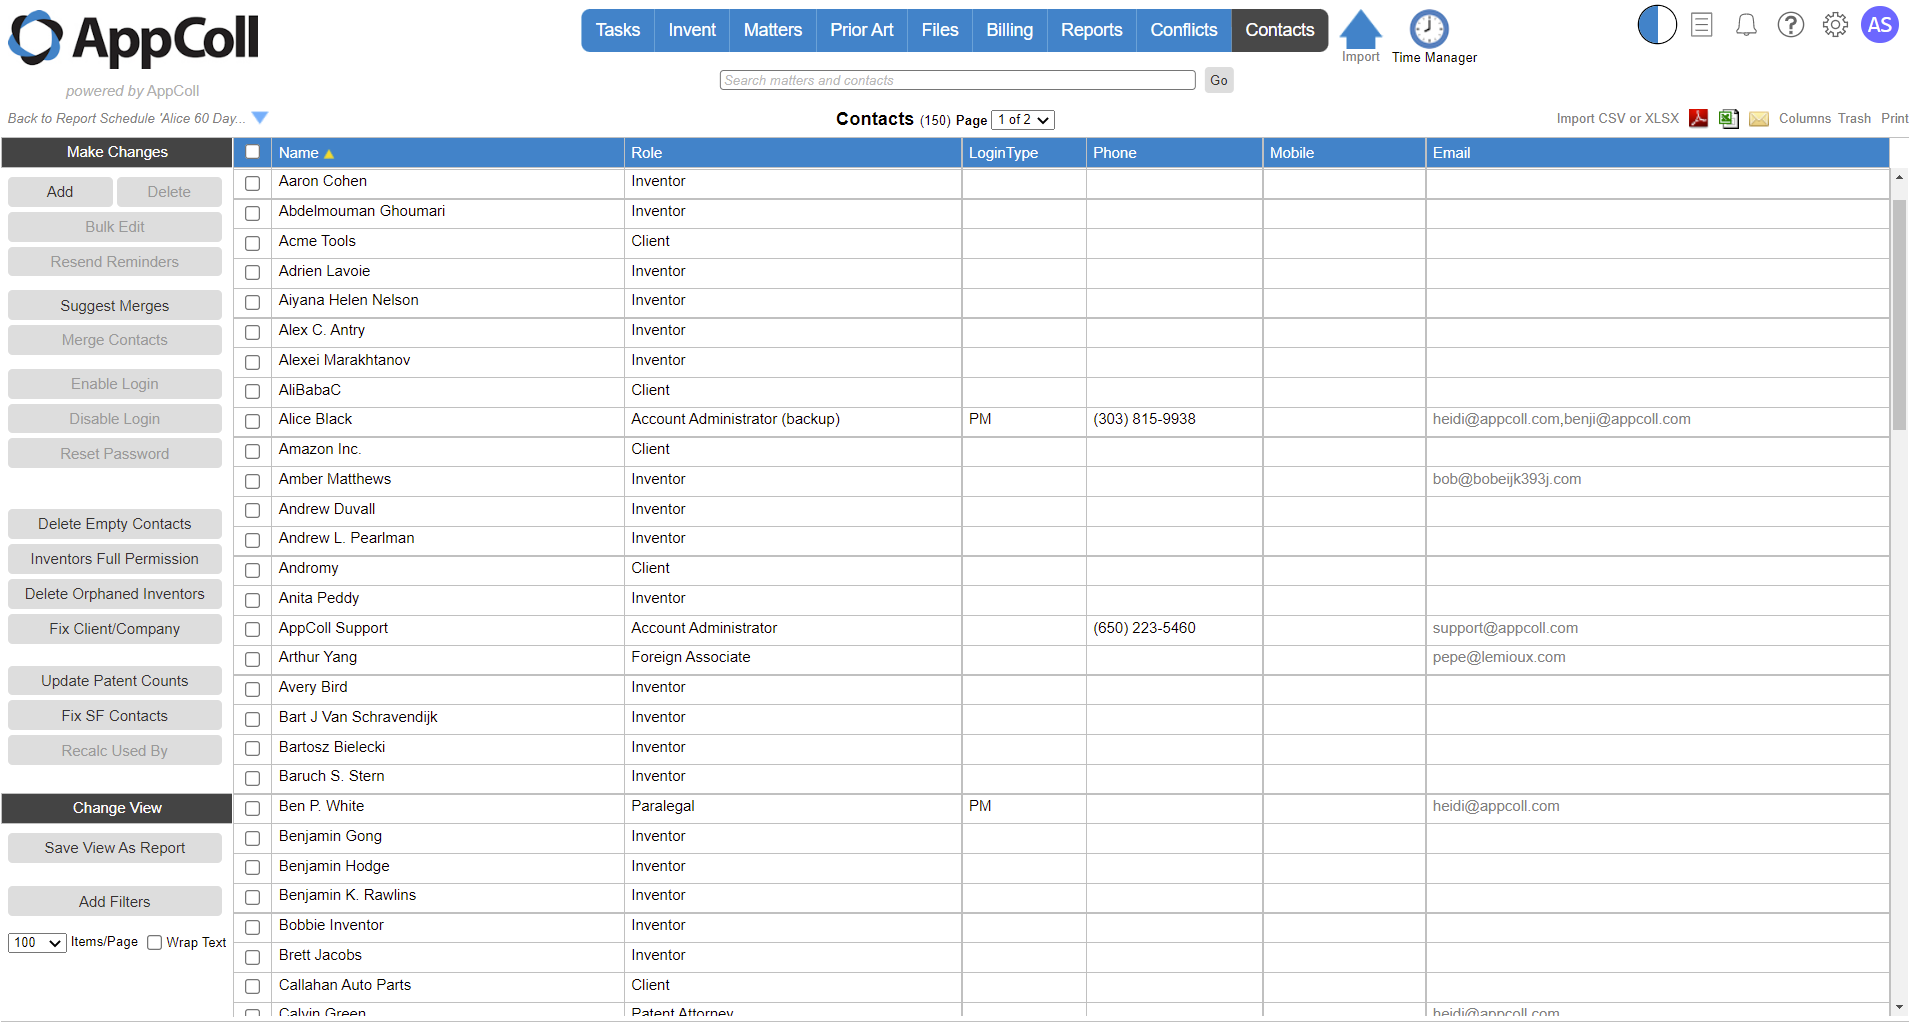 All contacts have a role, which defines how the contact is used in AppColl and where it can appear in the various modules in the system. For example, contacts with the role Patent Attorney will appear in the Attorney field menu in a matter. Contacts with a Law Firm role appear in the Remit-To field menu in an invoice.
One special kind of role is Account Administrator. Contacts with this role have full access to all features and information in the system, and can change the permissions of other users in the account. Obviously, only Account Administrators can set the role of a contact to Account Administrator. Since an Account Administrator is required for each account, they can also act as any other role, including Attorney, Employee, Docketing Manager, Manager, or Paralegal. For example, an Account Administrator can be listed as the Attorney for a given matter.
Information from the contacts module is used to populate forms and PDFs generated by AppColl. For example, the information in an inventor's contact record would appear in a USPTO declaration form and the address information in a client's contact record would appear in an invoice.
Many contacts are created automatically when data is imported into AppColl. Inventor contacts, for example, are created when XML data files are download from USPTO Patent Center and imported into AppColl. When importing patent matters, it is common to end up with duplicate inventor contacts, each with slight name variations, because the inventor name is slightly different across patent applications. Duplicate contacts can easily be merged into one by selecting each contact and clicking the Merge Contacts button.
Tandem Module
The Tandem module provides an effective and secure way for IP firms using AppColl PM Plus to provide clients with a controlled copy of their own IP portfolio information.

A Tandem account, available at no cost to AppColl PM Plus subscribers, provides a capable set of features that allows a client corporation to view and generate reports based on data that transferred automatically from their attorney's AppColl account. The data that is transferred from the attorney's account to the corporation's account is completely controlled by the attorney and can be adjusted or stopped at any time.