Enabling and Disabling logins are fully controlled by an administrator of your account. From the Contacts Module, you can enable/disable a login with the click of a button.
Enabling a Login
- Navigate to the Contacts Module.
- Make sure the person you wish to enable a login for already exists in the contact database. It is imperative that they have an email address, as their login ID is their email address.
- Scroll or filter to find the contact(s) you wish to enable a login for.
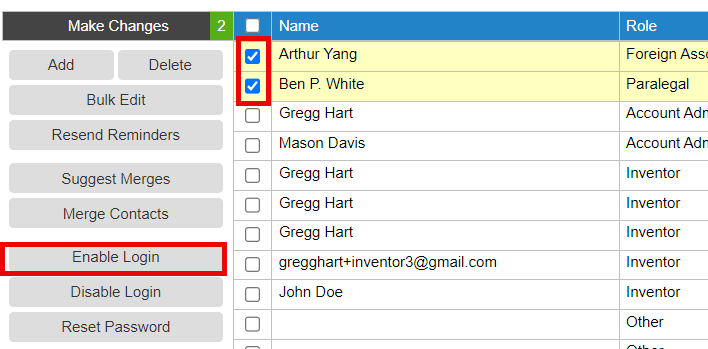
- Check the box next to the contact(s) and click the Enable Login button.

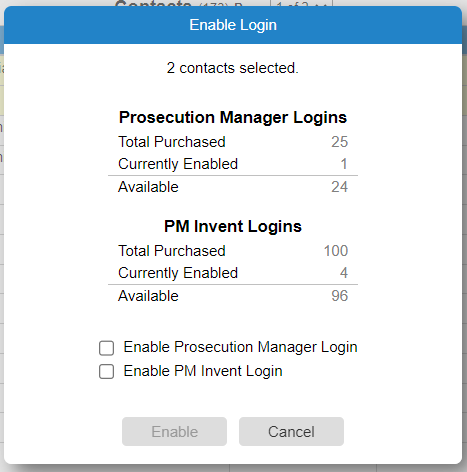
- You should see a popup like this showing how many logins you have purchased, how many are being used and how many are available

2. If there are no available logins you can disable an existing one or purchase additional ones by contacting support@appcoll.com.
3. If there are available logins, click the Enable button which generates the login and sends an email with login/password information to the recipient's email address.
Disabling Logins
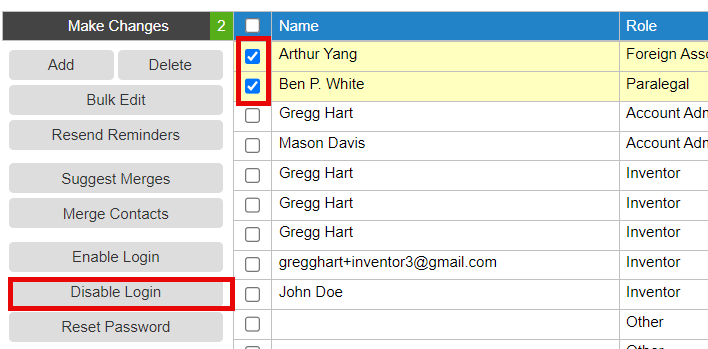
If you wish to disable a user's login, reverse the steps by checking the box next to one or more contacts and the click the Disable Login button. While the user's login is disabled, the contact still remains in AppColl. You can delete the contact record provided the contact is not associated with anything such as tasks, matters, billing items or invoices.

If they have any tasks, matters, or billing items associated with them, you will not be able to delete their contact record until you disassociate them from all these items. Click here for details on deleting a contact associated with existing items.